Narrated Training Experience

Blood Culture Collection Training

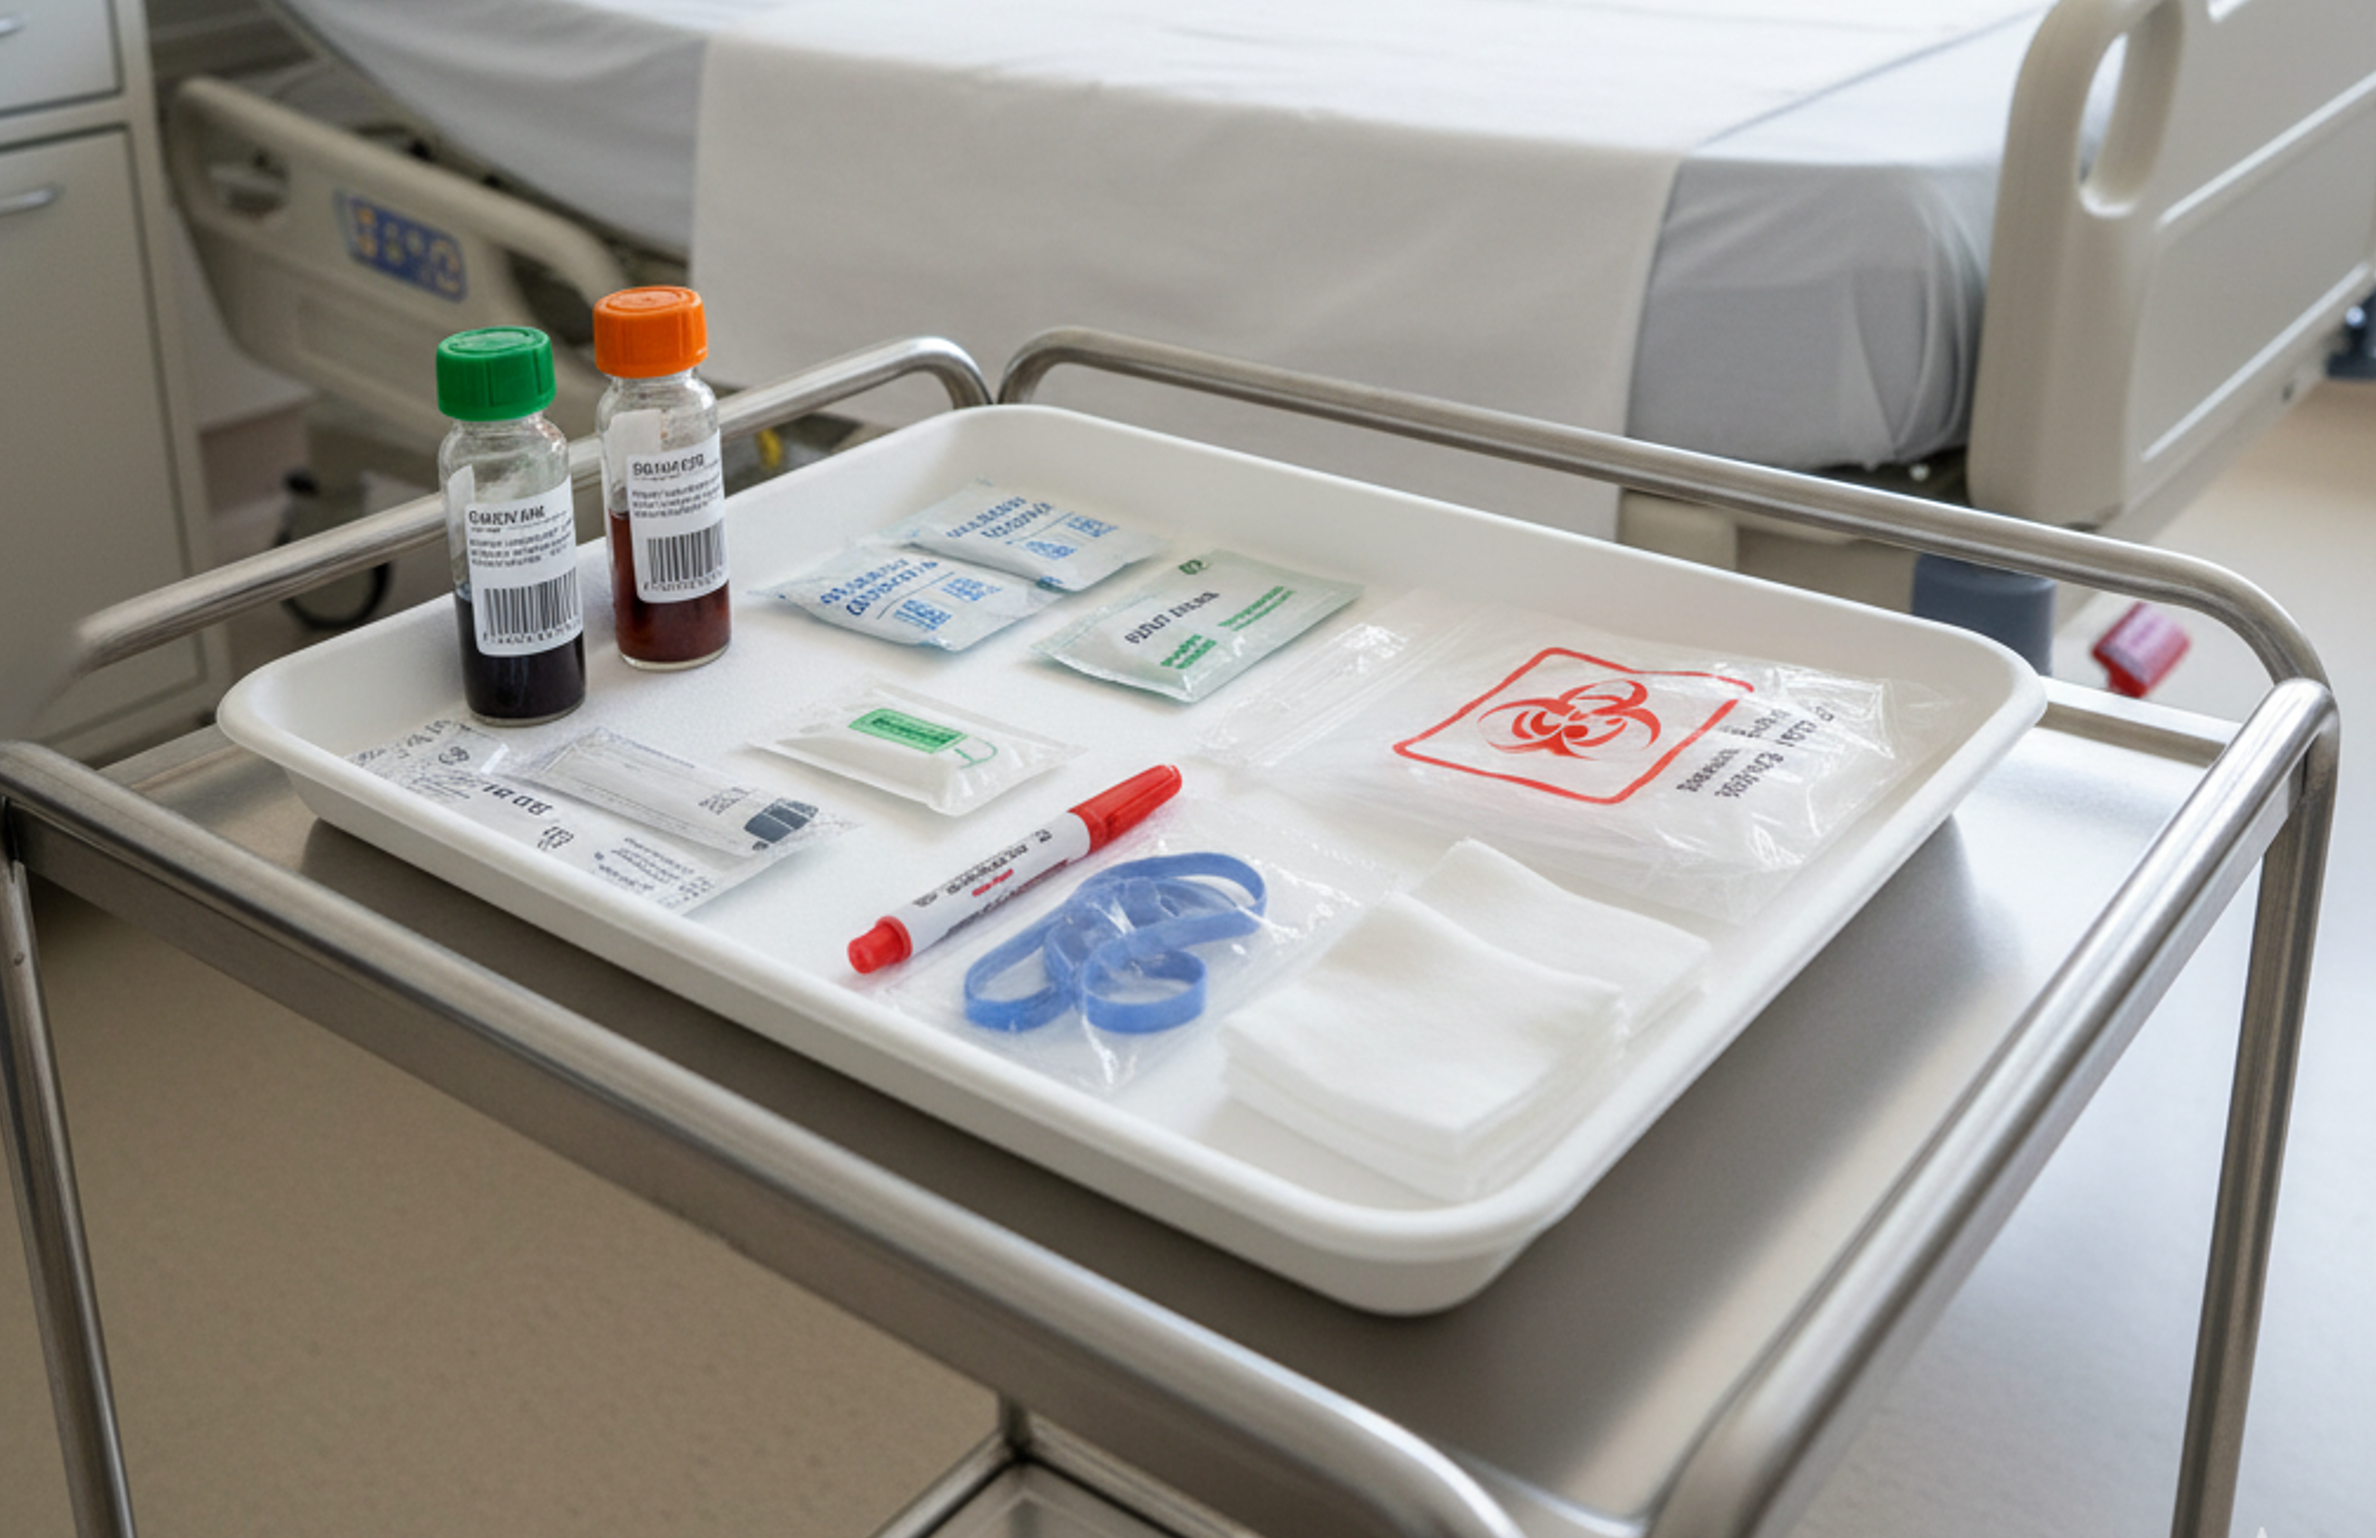
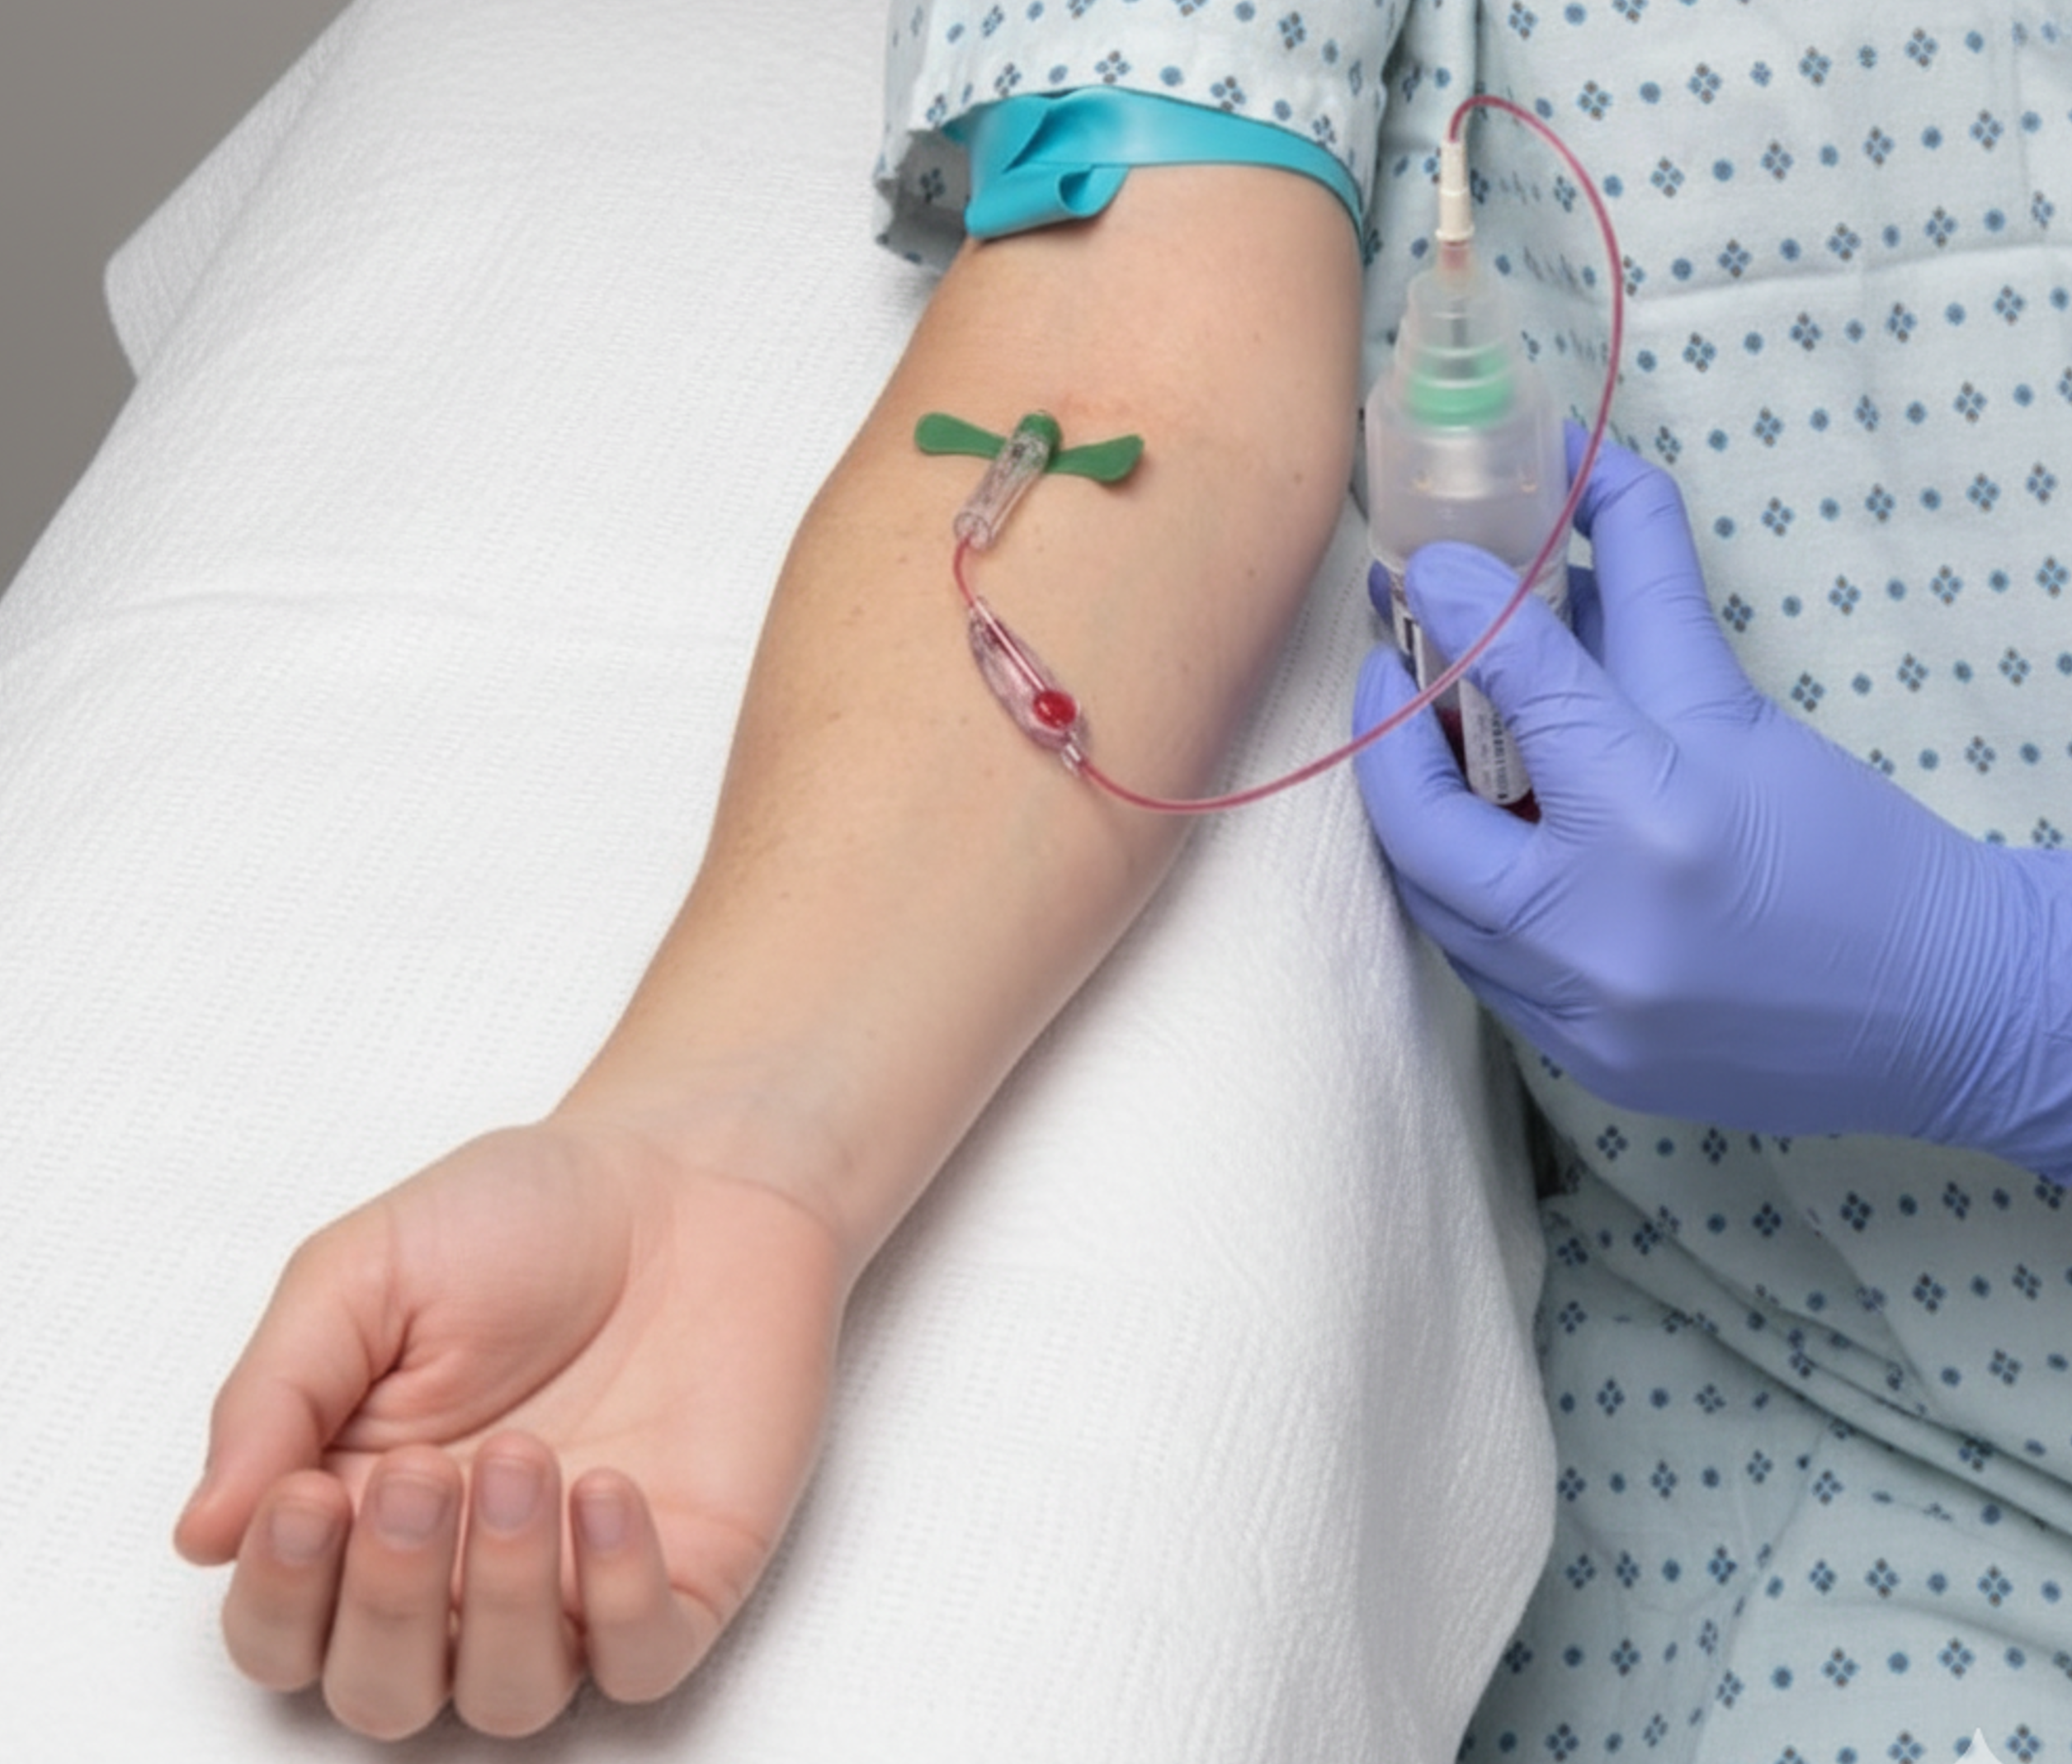
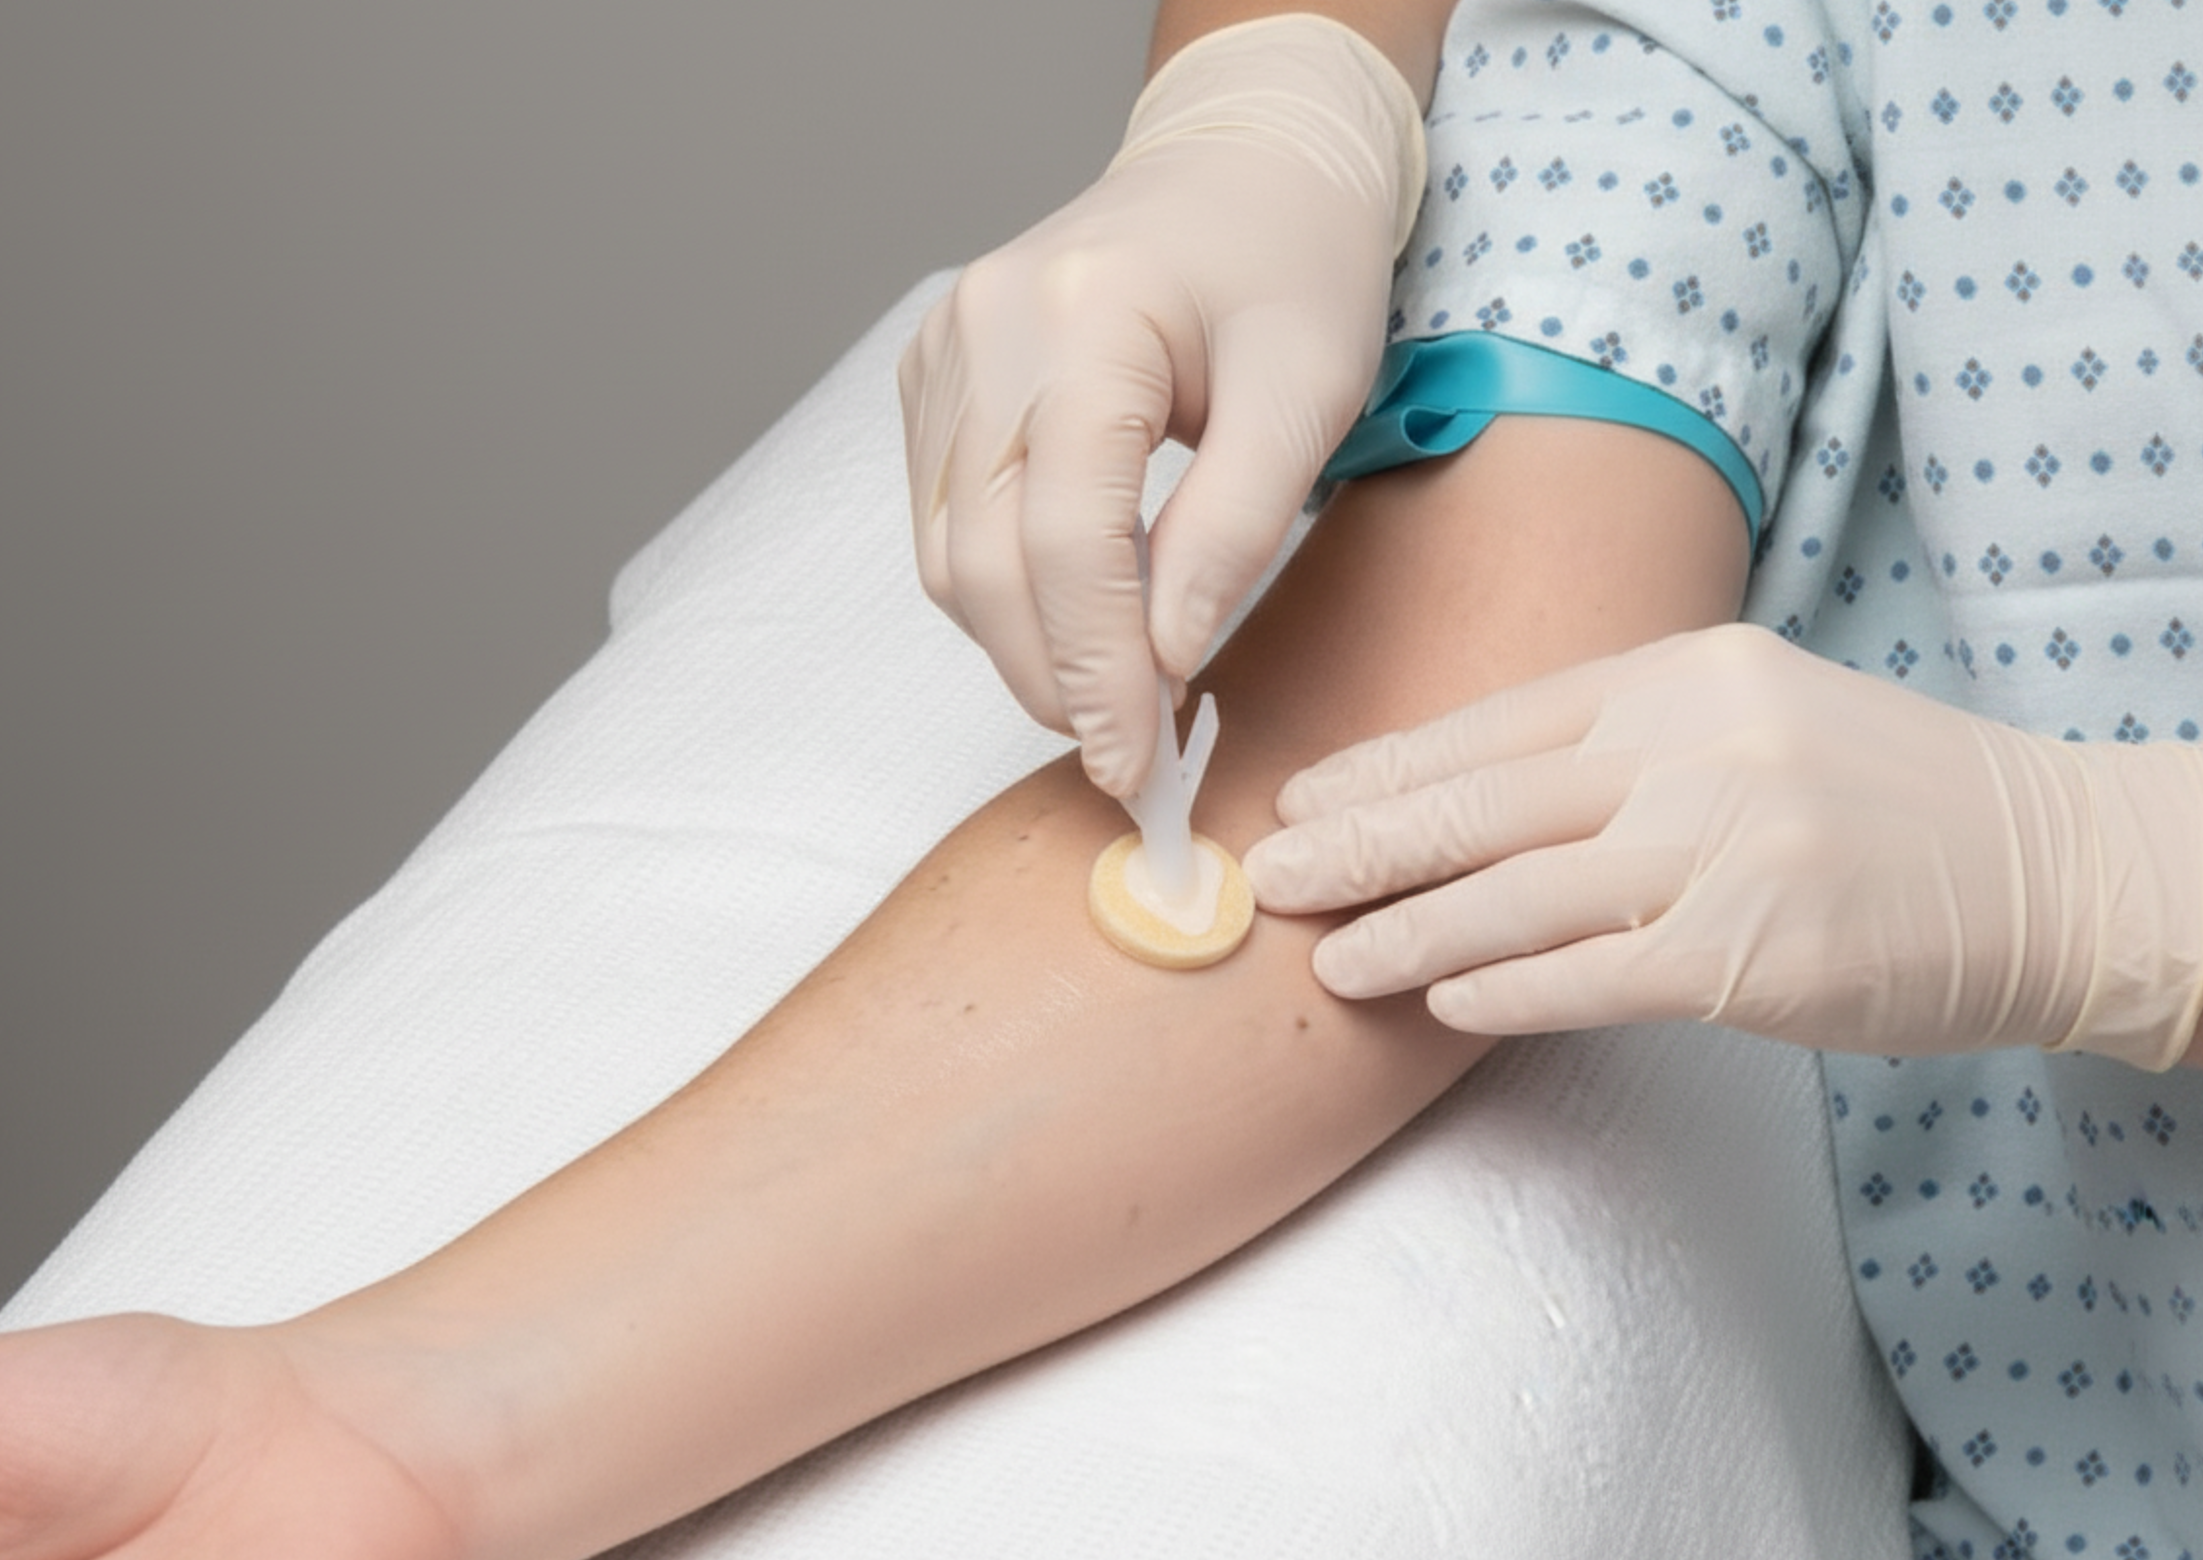
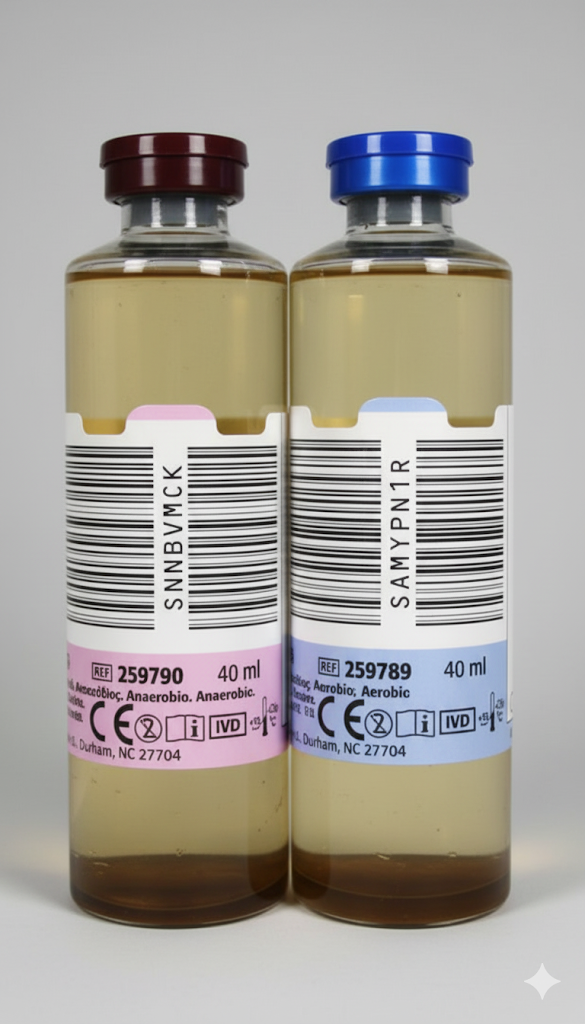
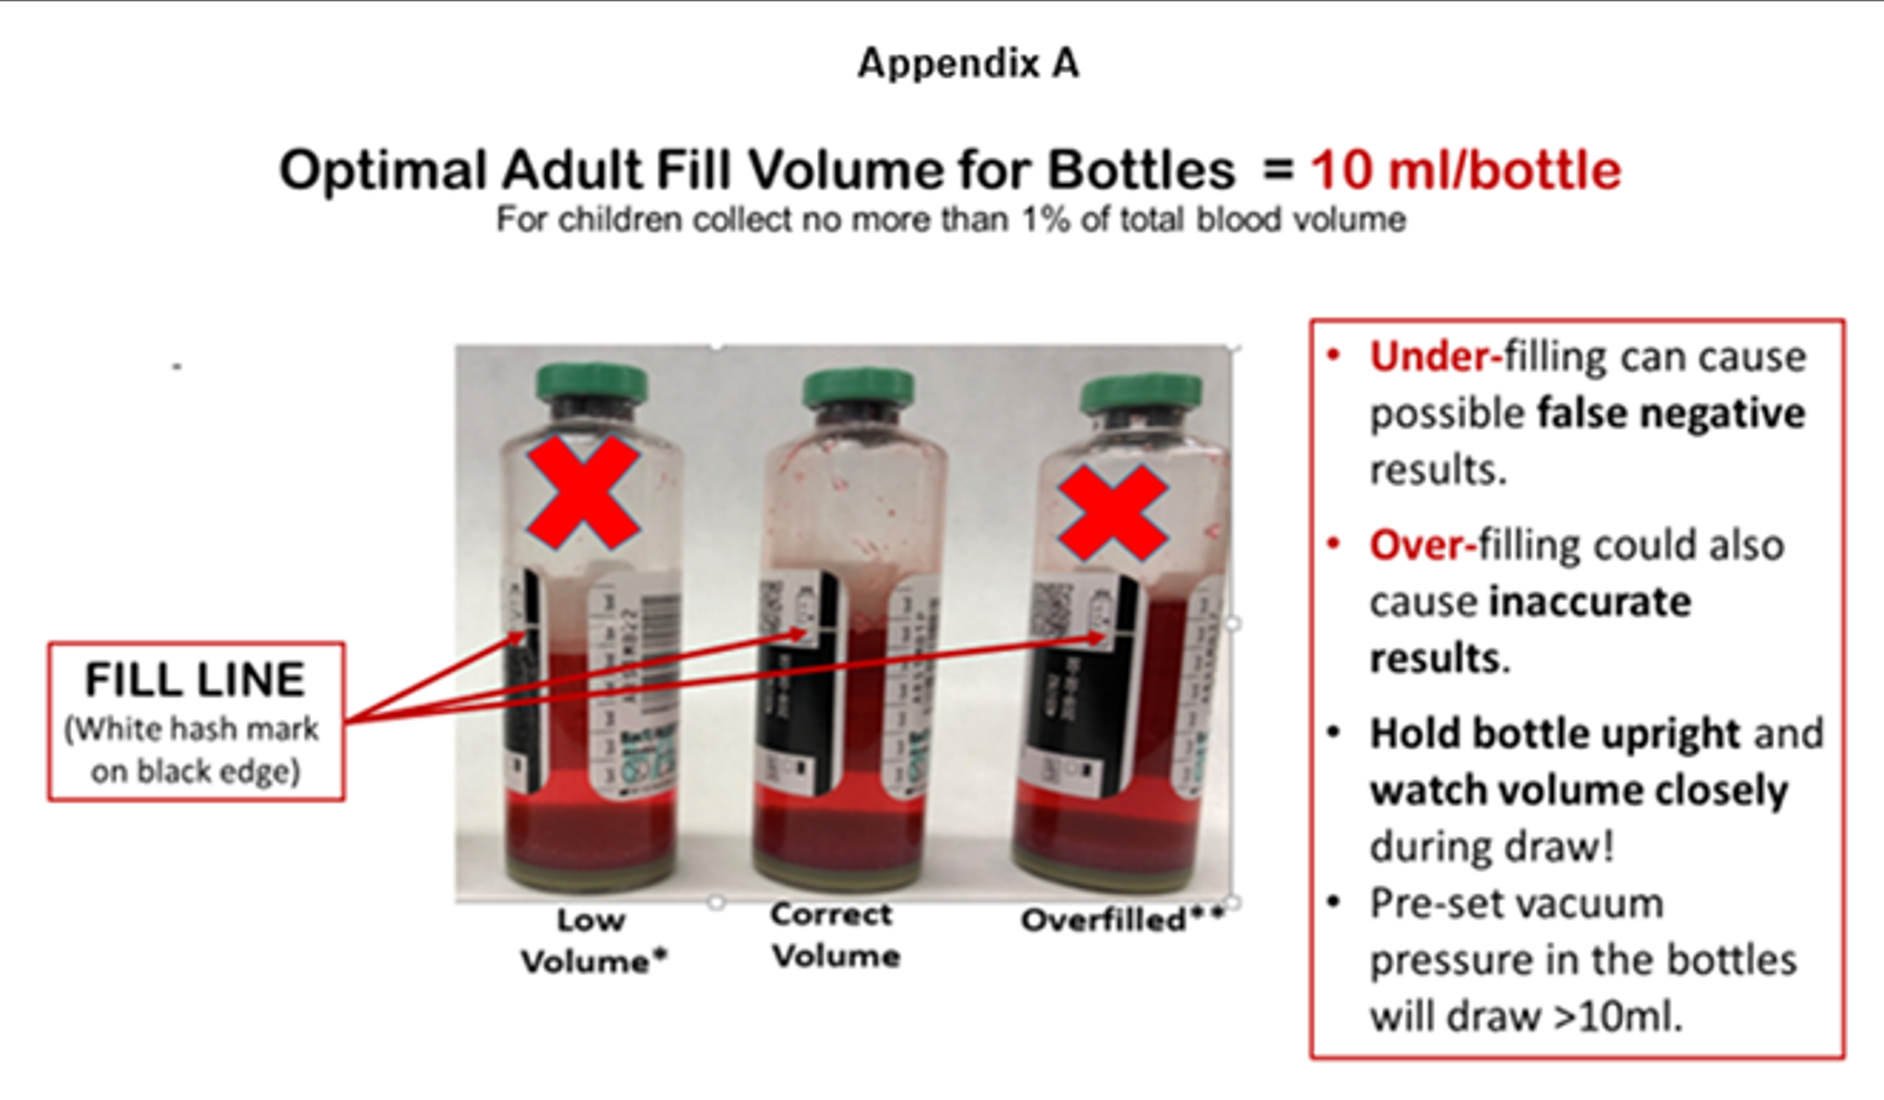
Learn the proper techniques for blood culture collection to prevent contamination and ensure accurate patient results.

33%
Contamination Rate
$4K-$10K
Cost Per False Positive
2.5
Extra Days in Hospital
80%+
Preventable

Why This Really Matters

Consider this scenario: A patient presents with fever. Blood cultures are drawn following standard procedure and come back positive. Treatment with vancomycin begins immediately.

Three days later, the culture is identified as a contaminant—skin flora that never entered the bloodstream.

The impact is significant. Contaminated cultures lead to unnecessary treatment, extended hospital stays, and increased healthcare costs.

Unnecessary Antibiotics
100%
Of contaminated cultures lead to unnecessary treatment
Extended Hospital Stay
2.5 days
Average increase in length of stay
C. diff Risk
Higher
Increased risk of antibiotic-associated infections
Financial Impact
$100K-$300K
Annual cost per hospital facility
01

Patient Identification & Preparation

Now that you understand why this matters, let's dive into the technique. We're going to walk through eight critical steps together—and here's what might surprise you: Step one actually starts before you even touch the patient. Patient identification isn't just checking a wristband—it's your first line of defense in the entire process.

💡 Pro Tips

  • Make sure your patient understands why you're doing this
  • Clean the general area first if patient has been sweating or has visible soil
  • Create the ideal environment for a clean draw
  • When patients know it's important, they're less likely to move or touch the site
Patient Identification and Preparation - Proper verification procedures
02

Hand Hygiene & Glove Technique

Proper hand hygiene is critical for preventing blood culture contamination. Your hands carry normal skin flora including Staphylococcus epidermidis, Corynebacterium, and Propionibacterium species, which are common contaminants in blood cultures.

💡 Critical Steps

  • Perform hand hygiene: 20-second hand wash with soap and water, or use alcohol-based hand sanitizer
  • Don clean gloves immediately after hand hygiene (verify your facility's glove policy)
  • Once gloves are on and the site is prepared, avoid touching any non-sterile surfaces
  • If gloves become contaminated, remove them, perform hand hygiene again, and don new gloves
  • Maintain aseptic technique throughout the entire procedure
03

Site Selection

Site selection is an art and a science. Think of yourself as a prospector looking for gold—you want that pristine, uncontaminated blood supply.

💡 Golden Rules

  • Never draw from an existing IV line (unless absolutely only option with physician order)
  • IV catheters are colonized with bacteria within hours of insertion
  • Prefer antecubital fossa—easy access, good flow, minimal hair
  • Avoid areas with broken skin, rashes, or burns
  • Avoid areas above an IV site (diluted blood, potential contamination)
Blood Culture Site Selection Guide - Antecubital fossa preferred location
04

Skin Antisepsis

This is where the magic happens—or where it all falls apart. Most facilities use chlorhexidine gluconate with alcohol. This step requires patience and precision.

💡 Critical Technique

  • Scrub for full 30 seconds in back-and-forth motion, creating friction
  • Don't just dab or wipe—actually scrub (you're disinfecting, not painting)
  • Let it dry completely (at least 30 seconds, longer if humid)
  • The antiseptic needs contact time to kill bacteria
  • Wet antiseptic pushes live bacteria into your blood culture bottle
Skin Antisepsis Technique - Proper chlorhexidine application and dry time
05

Culture Bottle Preparation

While your antiseptic is drying on the patient's skin, use this time efficiently to prepare your culture bottles. This is a critical contamination checkpoint that is often underestimated. Blood culture bottle tops are not sterile—they have been stored in supply rooms, handled by multiple staff members, and exposed to environmental contamination. Research shows that inadequately disinfected bottle tops are a significant source of false-positive cultures.

💡 Evidence-Based Procedure

  • Step 1: Remove protective dust covers from both aerobic and anaerobic bottles
  • Step 2: Vigorously scrub each rubber stopper (septum) with 70% isopropyl alcohol for minimum 5-10 seconds using friction and circular motion
  • Step 3: Allow stoppers to air dry completely—do NOT blow on them or fan them (introduces oral flora and environmental contaminants)
  • Step 4: Maintain sterile technique—do not touch disinfected stoppers with hands or gloves
  • Workflow Efficiency: Prepare bottles during the 30-second antiseptic dry time on patient's skin
  • Kurin System: Closed-system design significantly reduces contamination risk, but proper bottle preparation remains essential
Culture Bottle Preparation - Cleaning bottle stoppers and proper prep technique
06

Step 6: Blood Collection

Perform venipuncture using sterile technique. Do NOT palpate after prepping—this recontaminates the site. Reapply tourniquet without touching the prepared area. Insert needle at 15-30° angle, bevel up. Fill the AEROBIC bottle first to prevent air introduction into the anaerobic bottle. Fill bottles to appropriate volume of 8-10 mL per bottle for adults.

💡 Key Steps

  • Do NOT palpate after prepping - recontaminates the site
  • Reapply tourniquet without touching the prepared area
  • Insert needle at 15-30° angle, bevel up - proper technique
  • Fill AEROBIC bottle first (prevents air introduction into anaerobic bottle)
  • Fill bottles to appropriate volume (8-10 mL per bottle for adults)
  • Do not change needles between bottles
  • Inadequate volume = false negatives
Blood Collection Technique - Proper venipuncture and sample collection methods
🏥 MANDATORY HOSPITAL POLICY

Kurin Lock with Flash Technology™

Now that you've performed the venipuncture, let's discuss something absolutely critical. Our facility mandates the Kurin Lock system for every single blood culture draw. This is not optional. This is not a suggestion. This is required hospital policy for all blood culture collections, without exception.

🚨 The Science: Initial Blood Flash Contamination

The initial flash of blood contains the highest concentration of skin contaminants—Staphylococcus epidermidis, Corynebacterium species, Propionibacterium acnes—all the surface bacteria that cause false-positive cultures. This flash is mechanically pushed into the specimen by the needle itself, carrying skin flora directly from the puncture site. Traditional blood culture collection has no mechanism to address this problem.

💡 The Solution: Kurin Flash Technology Engineering

  • U-shaped diversion channel captures initial contaminated flash (precisely 0.15 mL)
  • White porous plug acts as biological filter, sequestering contaminants
  • Clean blood from deeper within vein flows through primary sampling channel
  • Visual confirmation: Blood advances in diversion channel, then stops
  • 80% contamination reduction when combined with proper aseptic technique
  • Minimal blood waste - ideal for pediatric and difficult-access patients

📊 Clinical Evidence & Patient Impact

  • Cost savings: Every contaminated culture costs $4,000-$10,000 in unnecessary treatment, extended hospitalization, and additional testing
  • Patient safety: Prevents unnecessary antibiotic therapy, extended hospital stays, hospital-acquired infections, and antibiotic resistance development
  • Compliance: Kurin Lock use is documented hospital policy. Compliance is monitored. Every blood culture draw. Every patient. Every time. No exceptions.
07

Sample Handling & Transport

After collection, your job isn't done. Sample handling can make or break everything you've worked for. Documentation and timing are critical.

💡 Documentation & Transport

  • Label bottles immediately at bedside
  • Include: patient name, MRN, date, time, your initials
  • Some facilities want arm drawn from noted (helps infection control investigate)
  • Get to lab ASAP (within 30 minutes if possible)
  • Most organisms start growing within hours
  • Don't leave them at nurses' station while finishing other tasks
  • Time is literally growing bacteria—both wanted and unwanted
Sample Handling and Transport - Proper labeling, documentation, and timely transport
08

Quality & Continuous Improvement

Every blood culture you draw is an opportunity to perfect your technique. The best nurses track their own contamination rates and continuously improve.

💡 Professional Excellence

  • Ask lab or infection control for feedback on your contamination rates
  • If a culture gets flagged, don't get defensive—get curious
  • Analyze: Was site selection suboptimal? Did you rush antisepsis? Did you palpate after prepping?
  • Every contamination is a learning opportunity
  • When you master this, you become THE person everyone comes to
  • You become known as the nurse who gets it right
  • That's professional excellence
Quality and Continuous Improvement - Tracking contamination rates and professional excellence
Audio Guide (Click to minimize)
Click Play to Start
Welcome & Introduction
0:00 0:00
Voice Narration Available
Click the microphone icon to enable audio narration
🔬

Kurin Technology Solutions

Congratulations on completing the blood culture collection training! Now let's explore advanced Kurin technology solutions that help reduce contamination and improve collection efficiency.

💡 Key Technologies

  • Lock Flash Technology: Sidelines initial blood flash to reduce skin contaminants
  • Push Button Needle: Advanced design for easier venipuncture
  • Kurin Jet System: Instant blood delivery for difficult-access patients
  • Watch each video to understand proper usage techniques
  • These innovations can significantly reduce contamination rates

Kurin Lock Flash Technology

Advanced Push Button Needle

Kurin Jet Blood Culture System

📝

Knowledge Assessment Quiz

Test your knowledge of blood culture collection. Answer all 10 questions to complete your training. Each question covers key concepts from the training modules.

💡 Quiz Instructions

  • Click 🔊 to hear each question read aloud
  • Select the best answer from multiple choices
  • Immediate feedback will be provided
  • Review explanations for each answer
  • Complete all 10 questions to finish

📋 Before You Begin

Please enter your name to start the quiz.
Your name and score will be recorded for certification.